Kanban: Definition, 6 Rules, and its Benefits
Kanban is a crucial part of the Just in Time (JIT) system, which we discussed…
Sean Thobias
May 17, 2025In the last chapter, we covered why your retail location matters. Now that you’ve chosen your store’s location let’s dive into practical tips for designing and furnishing your store’s interior.
A retail layout is how you strategically use retail space to shape your customer’s experience. It involves critical elements like where you place displays and fixtures, organize zones and departments, and position merchandise.
A good retail layout helps customers move around with ease. Clear paths and organized sections make shopping more enjoyable, preventing frustration and boosting satisfaction.
Putting popular or high-profit items in strategic spots guides customers to different sections, prompting them to explore and find more things they might like.
A well-planned retail layout helps retailers use their space wisely by positioning products strategically. Neat shelves and displays prevent mess and make the store more welcoming, maximizing floor space for a more comprehensive product selection and a comfortable customer experience.
Moreover, an organized layout improves store operations. Employees can move around efficiently, restock shelves easily, and assist customers more effectively.
According to POPAI (Point of Purchase Advertising International), where you put things in your store can impact sales — 76% of in-store decisions are influenced by displays and placement.
Creating a nice-looking store with well-thought-out product displays boosts your customers’ mood and increases their chances of buying something. Place products strategically and make eye-catching displays to shape how customers see your items, nudging them toward purchasing.
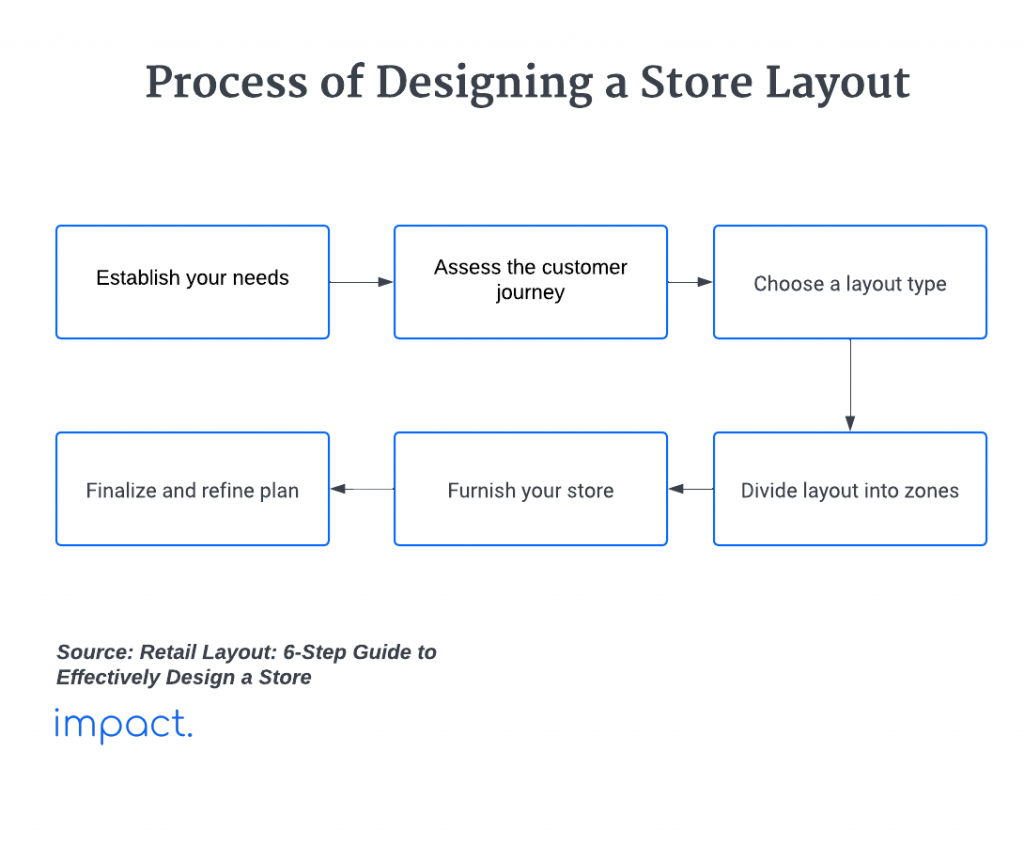
Define what you’re selling and how you want customers to feel when they shop with you. Figure out how many items you’re stocking and how to show it off best. Also, consider where to keep your extra stock, set up cash registers, and create workspaces for your team.
The store design can help customers solve their pain points. When a customer enters a store, their decision process goes through need, choice, and commitment.
Organize your store layout with the customer in mind to boost sales and keep customers returning. Strategically position products, design eye-catching displays, and enhance the overall shopping experience to smoothly guide customers from browsing to buying, increasing the chances of making a sale and building loyal customers.
Retail stores have different layout types, each with advantages and disadvantages. So consider wisely according to the store you set up and the products you sell.
Grid layout arranges aisles and merchandise in a grid pattern. Products are shown in a predictable pattern that’s easy to navigate.
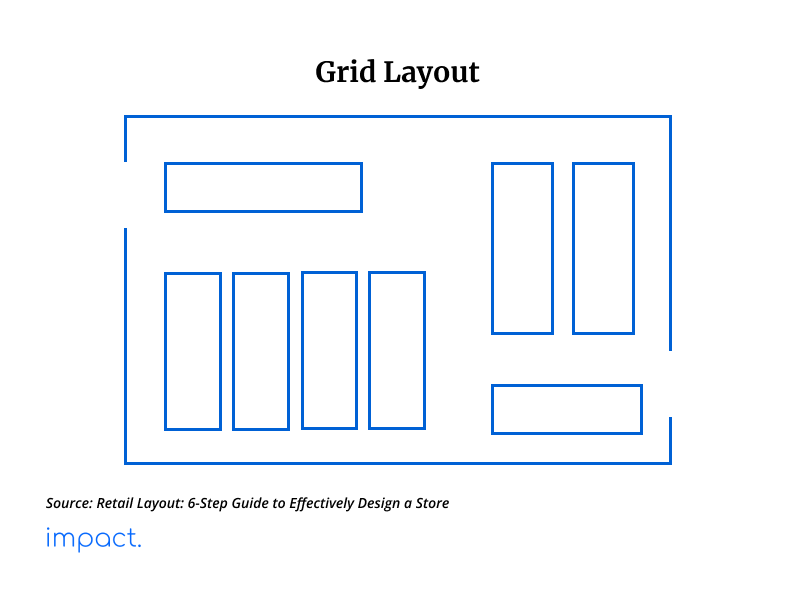
Typically found in grocery and convenience stores, the grid layout features long aisles with staple items at the back and impulse-purchase items near the checkout.
Pros:
Cons:
This retail layout has a central aisle that makes a loop, like a racetrack, leading customers in a steady flow past the merchandise.
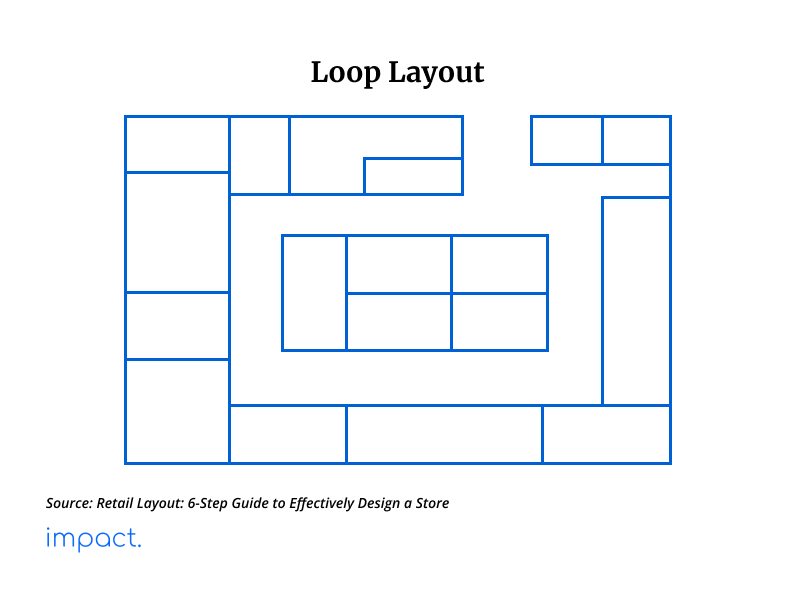
This store design creates a closed loop that leads shoppers past all the merchandise in the store. The layout is standard in larger retail spaces, such as department stores and clothing outlets.
Pros:
Cons:
This layout lacks a specific structure, allowing for more flexibility and creativity in placing aisles and displays.
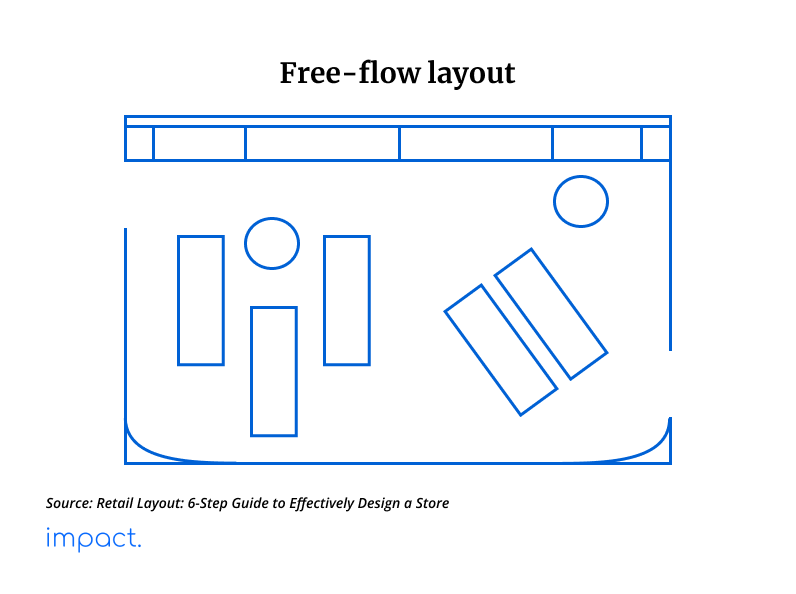
It encourages shoppers to wander around the store and explore the products at their own pace without a prescribed pattern. This layout suits small spaces and is best suited for high-end stores with less merchandise but an emphasis on experiential retail.
Pros:
Cons:
Also known as the spine layout, this design arranges fixtures and merchandise in straight lines to establish clear sightlines and organized pathways.
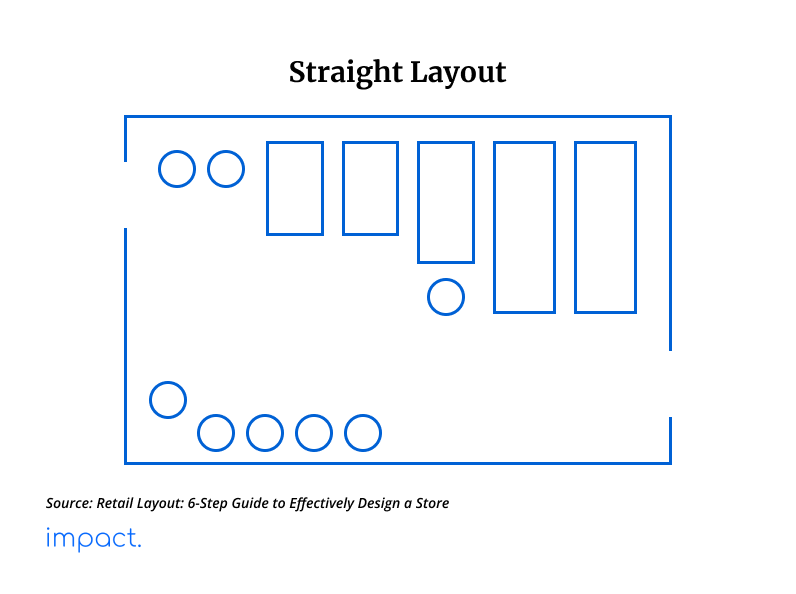
It engages shoppers with signage, product displays, and strategic merchandise placement. When executed correctly, this straightforward method can establish an inviting space that encourages shoppers to spend more time browsing.
Pros:
Cons:
The diagonal layout arranges aisles and displays at angles other than 90 degrees, creating a dynamic and visually exciting store design.
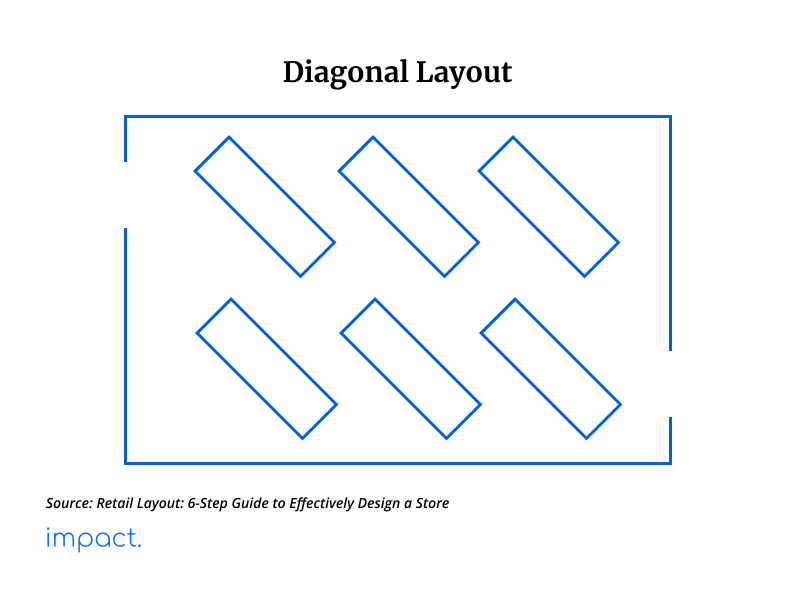
Ideal for stores with limited retail space, this layout promotes movement, ensuring customers can easily view all products. It is commonly used in apparel stores, boutiques, and larger retail spaces.
Pros:
Cons:
In a retail store, focus on four key zones: the entry, cash wrap (checkout area), the sales floor, and the back room. Here are the design guidelines for each area.
This space aims to create a welcoming first impression and draw customers inside. It encompasses the window display and a transition area — an open and appealing space near the door where new customers can quickly pause and survey the surroundings.
Design guidelines:
The cash wrap or checkout area is designed for quick and easy transactions to create a positive, lasting impression. The best location for it is near the main entrance and alongside the area where you transition to the sales floor.
Design guidelines:
The sales floor is where you show off your products in a way that makes sense and is easy for customers to get to. Ensure your products are easy to see and encourage people to look around.
Not only should the sales floor help customers decide what to buy, but it should also suggest other things they might want. Customers might remember something else they need and buy more stuff.
Design guidelines:
The back room is a practical area for managing inventory and staff tasks. It’s also a place where employees can take breaks and relax.
If you have many products that can’t fit on the sales floor, store them in the back room. Set up a shipping area with a table and supplies if you need to send items to customers or return them to suppliers.
Design guidelines:
Like in your home, retail stores have different types of furniture and fixtures. What fixtures your store needs depends on what you’re selling.
Primary fixtures are a store’s main, permanent structures that shape its layout and overall design. They’re like the backbone, supporting the store’s look and providing the main structure for displaying stuff.
You can usually get them from fixture makers, retail design companies, or construction suppliers. Here’s a list of examples typically used in retail stores:
Secondary fixtures add flexibility and visual interest to your store layout. They’re versatile and easy to move around, making changing displays for different products or promotions simple.
You can find these fixtures from suppliers like fixture manufacturers, display equipment vendors, and online retailers focusing on retail. Examples of secondary fixtures include:
Check your store’s layout plan and make changes if necessary. Make sure the layout follows safety rules and accessibility standards.
Test the flow of the layout design by simulating customer journeys. If there are still issues, adjust the layout based on what you observe.
Your store layout is crucial for how customers see your brand. It impacts foot traffic, customer experience, and what they choose to purchase.
When designing your store layout, always consider your customers — aim for a quick and convenient shopping experience. Use software with Point of Sale (POS) capabilities to ensure smooth operations.
In the next chapter, we’ll help you pick and fill up your retail business with the proper inventory, set its retail price, and plan for restocking.
Ramsey, D., & Ramsey, J. (2010). The Everything Guide to starting and running a retail store: All you need to get started and succeed in your own retail adventure. Adams Media.
Impact Insight Team
Impact Insights Team is a group of professionals comprising individuals with expertise and experience in various aspects of business. Together, we are committed to providing in-depth insights and valuable understanding on a variety of business-related topics & industry trends to help companies achieve their goals.
Ask about digital transformation, our products, pricing, implementation, or anything else.
We are excited to be part of your transformation journey from day one.
